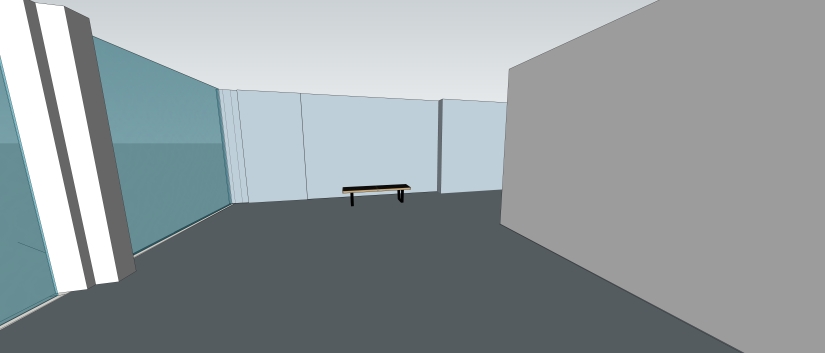
After the 3D model is made in Sketchup, We can send it to Photoshop to add a range of things such as, people, furniture, carpets and wallpapers.
First, The model needs to be positioned at the exact angle you want to edit from, this can be achieved by going into the large tool set and click on the person, that way its positioned so that an average sized human would be looking at the model, then click on the eye button to adjust what the person is looking at.
Then once you find a view you like, go to File->Export->Export 2D graphic.
Before you save, click the options button and make sure the highest quality is set. And make sure the image width is sett 7000 or higher.
Next open it up in photoshop
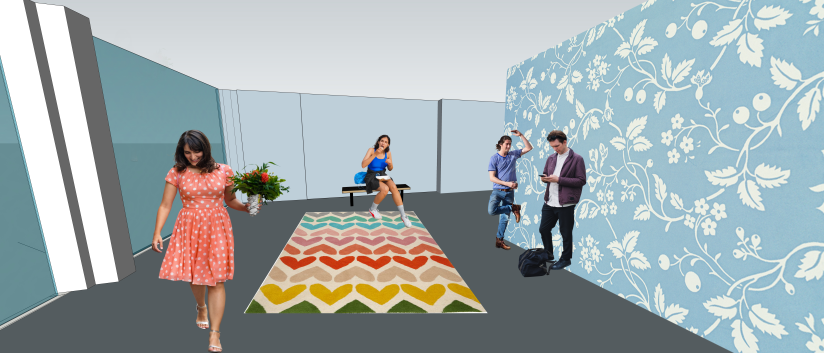
Use the line tool and draw lines on the walls until they all meet at a certain point in the image, This is where the vanishing point is on the image
draw an horizon line where the vanishing point is. This serves as a guide to correctly scale any people you place in this image.
add a person, then place them where you want them to go on the image, then scale it so their eyes are on the horizon line.
when adding custom patterns for flooring/walls use either the skew or distort tool to position it in perspective. then lower the transparency to help it blend in and make the final image look more realistic.